Introduction:
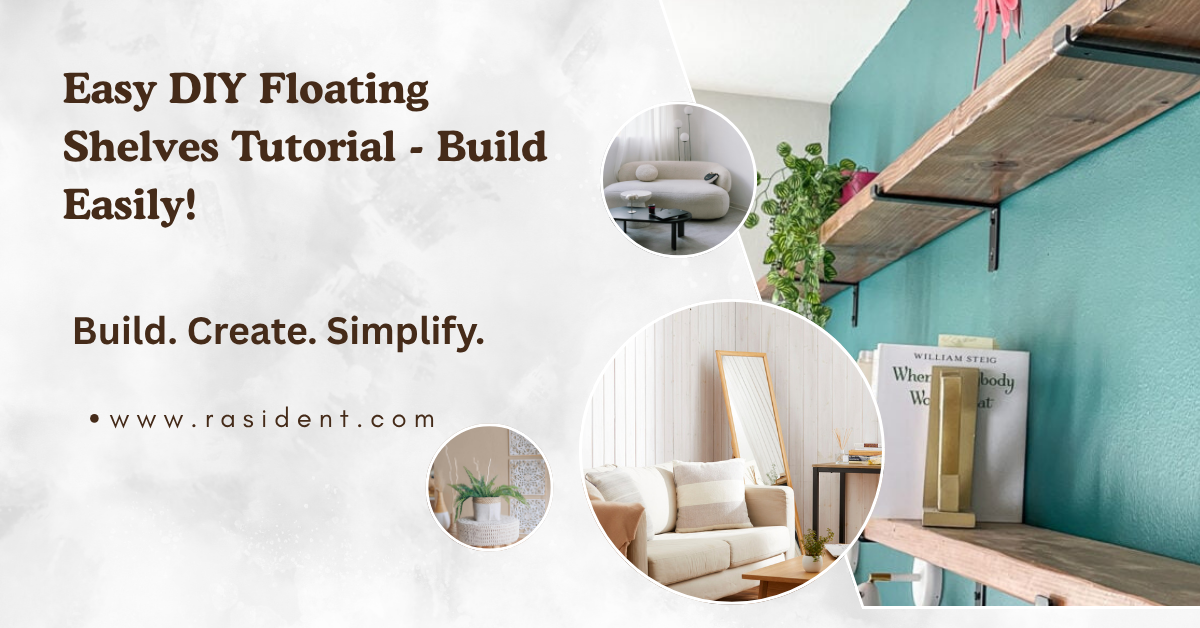
Easy DIY Floating Shelves Tutorial! One of the most stylish and inexpensive ways to update your home’s decor is with floating shelves. They save space, have a contemporary look, and help to arrange various objects elegantly. Floating shelves are an increasingly popular option among homeowners because they offer a clean wall design with no visible brackets.
Floating shelves are great for showing off books, plants, picture frames, kitchen jars, candles and decorative items. They also make rooms look more modern and organised and give you more storage space.
This easy DIY floating shelf tutorial will include everything from planning and material selection to installation and decorating tips. The procedures are followed in line with current home improvement trends and are perfect for beginners.
Upgrade your home with affordably priced modern storage by building stylish floating shelves.
Table of Contents
What Are Floating Shelves And Why Are They So Popular – Learn more!
Floating Shelves Floating shelves are wall-mounted shelves that have no visible support brackets. This hidden mounting system gives a modern sleek look that will fit in with almost any home.
Floating shelves are popular for the following reasons:
- Save floor space
- Increase the organization of the wall
- Contemporary interior design
- Create simple interior spaces.
- Increase the storage area Less expensive than cabinet
- Work in enclosed areas
Many homeowners choose floating shelves for their living rooms, kitchens, bedrooms and bathrooms, because they are good looking and practical.
Additionally, they are easy to modify. Choose from a variety of wood finishes, colours and sizes depending on the style of your space.
How to Properly Plan DIY Floating Shelves – Plan Wisely!
First and foremost, planning is the most important step before starting any do-it-yourself shelf project. Good planning ensures a solid installation and helps prevent mistakes.
Important preparatory steps:
- Measure your wall space carefully.
- Determine the depth and length of the shelf.
- Select the right wall.
- Choose the shelf material.
- Strength of the wall is tested
- Measure the distance between the shelfs.
- Colour of shelves, matching with interior design.
Most floating shelves are 8 to 12 inches in depth. Books, décor, kitchen jars and indoor plants look good at this size.
Always pencil mark the location of shelves with a levelling tool before drilling holes.
What materials are best for floating shelves – Make Smarter Decisions!
The quality of the materials used determines the strength and look of the shelf. Shelves made of sturdy material will last for many years.
Typical materials include:
- Content
- Benefits
- Pine Lumber
- Lightweight and affordable
- Wood, Oak,
- Strong, high-end look
- Wood Plywood
- Cheap & easy to cut
- MDFboard
- Smooth surface to paint on
- Recycled Wood
- Eco-friendly and natural
Other Items You Will Need:
- Concealed shelf brackets
- Screws.
- Wall Anchors
- Paper (Sandpaper)
- Wood stain or paint
- drilling machine,
- Measuring Tape
Use good quality screws and anchors for stability and safety.
What Supplies Do You Need to Install Floating Shelves – Gather Resources!
Having the right tools makes DIY projects safer, faster and easier.
Drill Instrument:
A drill machine will help you drill holes for brackets and screws safely.
A tape measure:
Measuring tape ensures equal spacing and exact shelf size.
Levelling Instrument:
A levelling tool will ensure the shelves are level and straight on the wall.
A flat head screwdriver:
Secure hidden brackets with a screwdriver and tighten screws.
Sand paper:
Sandpaper is used to smooth out the wood surfaces before painting or staining.
Using proper tools leads to better quality projects and avoids installation errors.
How to Make Easy Floating Shelves DIY – Apply Now!
Building floating shelves is easy if you follow the instructions step by step.
To do this, first measure and mark the wall.
Use a pencil and level tool to measure the wall area and mark the precise locations of the shelves.
Step 2: Carving the Wood
Cut the wood to the size you want for the shelf. Smooth out uneven edges with sandpaper.
Step 3: Use stain or paint on the wood
Paint or stain the wood for protection and for decoration. Allow the shelves to dry completely.
Step Four Installing Concealed Brackets
Secure hidden brackets to wall studs with screws and a drill.
Step 5: Put in the shelves
Gently push the shelves onto the hidden supports and then snug up all the screws.
These steps are easy enough for novices to make floating shelves that look professional.
Best Design Ideas for Floating Shelves – Be Inspired!
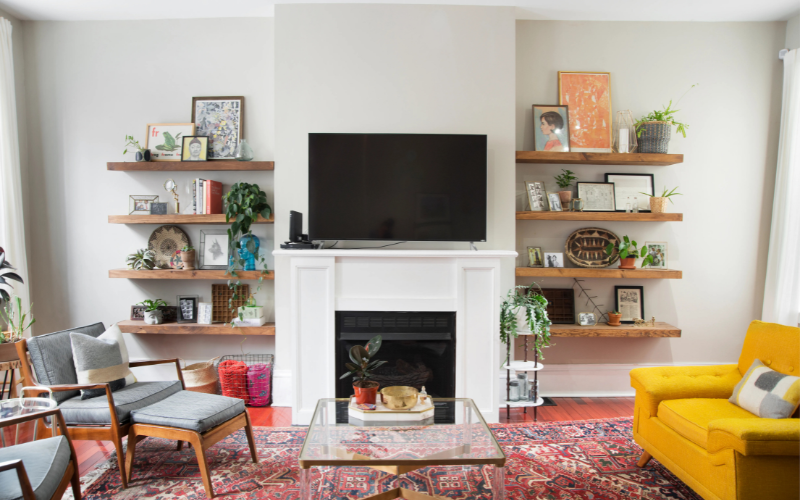
Many types of floating shelves can add style to a variety of rooms.
Rustic wooden shelfs:
Rustic shelving uses the natural textures of wood for warm farmhouse style interiors.
Floating Shelf White:
Clean modern white shelves. Minimalist home decor.
Floating Corner Shelves:
Corner shelving is a good use of limited space.
Industrial shelving:
Fashionable industrial style decor with black metal and wood design.
Heavy Duty Floating Shelves:
Luxurious and premium interior appearance with thick shelves.
These styles are perfect for bedrooms, kitchens, living rooms and bathrooms.
How To Decorate Floating Shelves Beautifully – Decorate with creativity!
A well decorated shelf can improve the look and organization of a room.
Add Indoor Gardening:
Small plants contribute freshness and natural beauty to shelves.
Display Photo Frame:
Family photos are a personal and appealing shelf decor.
Decorative books:
Books add texture and stylish order to shelves.
Add candles:
Candles create a warm and cosy room atmosphere.
Utilise Storage Baskets:
Small baskets to hide clutter and improve organization.
Elegant, modern interior design, with well-balanced shelf decoration.
What mistakes should you avoid when installing shelves – Don’t Make a Mistake!
When installing floating shelves, many beginners make basic mistakes.
Weak Wall Anchors:
Shelves may fall under heavy weight if anchors are weak.
Variable Measurements:
Shelves are crooked and ugly when measurements are wrong.
Economical Brackets:
Low quality brackets reduce the shelf’s strength and longevity.
Shelves Overloaded:
Excessive weight can damage walls and brackets.
Ignoring the Wall Studs:
Weak support when installing shelves without wall studs.
Avoid these mistakes and you will have safe and long-lasting floating shelves.
Why Are Floating Shelves Good for Small Spaces – Save Space!
Floating shelves are great for small homes because they use vertical wall space without taking up floor space.
Benefits for small spaces:
- Provides a more open feeling to rooms
- Less fuss
- Provides hidden storage
- Enhances room organization
- Creates contemporary interiors
Floating shelf storage options are perfect for small apartments and cosy bedrooms.
How Floating Shelves Can Boost Home Value – Add Value!
Modern wall shelves are both functional and look good in your home. Trendy shelving can draw buyers and boost property value.
Floating shelves enhance:
- Design of the interior
- Storage Size
- Household organization
- Modern aesthetic
- Space efficiency.
Often, simple DIY upgrades can make homes more appealing to potential buyers.
Where To Put Floating Shelves – Intelligent Living Room!
Showcase books, plants and decorative objects in fashion.
Kitchens:
A useful spot for dishes, spices and coffee cups.
bed:
Arrange books, clocks, and personal ornaments.
Bathroom:
Keep candles, toiletries, towels all neat and tidy.
Home Office:
Store office supplies, files, and decorative items.
Floating shelves are great in almost any room.
How to care for floating shelves – Keep Often!
Regular shelf maintenance will keep them clean and last a long time.
House Cleaning Weekly:
Dust shelves often keep them looking new.
Keep away from overweight:
Heavy objects can weaken brackets and wall support.
Tighten the screws up:
Regularly check the screws to ensure the shelf is stable.
Protect from moisture:
In humid areas like bathrooms and kitchens, wood sealants are needed.
Repaint as necessary:
Refreshingly painted shelves improve the look as time goes on.
Shelf maintenance prolongs the life of shelves and improves their appearance.
What are some cheap floating shelf ideas – Reduce Your Costs!
Homemade floating shelves are a more budget friendly option than expensive cabinets and furniture.
Cheap shelf ideas:
- Reclaimed wood use
- Outdated shelves painting
- Using leftover materials
- Basic pine wood shelves installed
- Cheap concealed brackets buying
With these tips, the owners of the houses can create modern interiors without spending a lot on the renovation.
FAQs:
Can I place heavy items on floating shelves?
Floating shelves are actually quite sturdy when they are installed properly with quality brackets and wall studs for support.
What is the best wood for floating shelves?
But oak wood is more durable and fancier, while pine wood is cheaper for beginners.
Are floating shelves easy for beginners to make?
Yes, even beginners in DIY can build floating shelves with just basic tools and following methodical installation practices.
Floating shelves should be 12 inches deep.
Most floating shelves are 8 to 12 inches deep, depending on your storage and decorating needs.
Can you use floating shelves in a small space?
In fact, floating shelves open up floor space, give the illusion of more space in small areas and make it appear cleaner.
Conclusion:
One of the best home improvement projects for beginners is making simple DIY floating shelves. They are inexpensive, trendy, compact and easy to install. Floating shelves can enhance both aesthetics and functionality, whether you’re aiming for contemporary living room décor, kitchen organization, or bedroom storage.
With good quality materials, accurate measurements and some imaginative ideas for decoration you can produce professional looking shelves at home for a reasonable price. Floating shelves are great for organising clutter but they also add a more modern and spacious feel to spaces.