

Budget-Friendly Kitchen Makeover Ideas! If you’ve ever stood in your kitchen wishing it looked like something out of a home magazine, but your bank account had other plans, you’re not alone. A full kitchen renovation can easily run into tens of thousands of dollars once you factor in cabinetry, countertops, appliances, and labor.
This guide walks through practical, tested ideas for giving your kitchen a fresh look on a real budget, not the fantasy budget numbers you see in glossy magazines that still assume you have $15,000 to spend. We’re talking about changes that cost anywhere from $50 to $2,000, depending on how far you want to take things.
Transform your kitchen on a budget with simple makeovers, smart DIY upgrades, stylish décor, and creative ideas that make every corner feel fresh.
Table of Contents
Why Does a Kitchen Makeover Don’t Require a Full Renovation?
Before diving into specific ideas, it helps to understand the difference between a renovation and a makeover. A renovation typically involves structural changes, moving plumbing, tearing out cabinets, and changing the layout. A makeover, on the other hand, works with what you already have. You’re refreshing surfaces, updating hardware, changing colors, and rearranging rather than rebuilding.
This distinction matters because the vast majority of what makes a kitchen feel dated isn’t the layout, it’s the finishes. Scuffed cabinet doors, outdated hardware, dingy grout, and old lighting fixtures do more to age a kitchen than an imperfect floor plan ever will.
Start With Cabinet Refacing Instead of Replacement
Cabinets are usually the single most expensive line item in any kitchen project. Replacing them entirely can cost thousands of dollars, even for basic stock cabinets. But if your existing cabinet boxes are still structurally sound, no water damage, no warping, hinges still functional, you almost never need to replace them.
1. Remove all doors, drawers, and hardware, and label them so you know where everything goes back.
2. Cleaning every surface thoroughly with a degreaser kitchen cabinets accumulate a surprising amount of grease film, even ones that look clean.
3. Lightly sand every surface to give the paint something to grip onto. You don’t need to strip the finish, just scuff it.
4. Apply a bonding primer designed for cabinets or laminate surfaces. Skipping this step is the number one reason cabinet paint jobs fail within a year.
5. Use a high-quality enamel paint, applied in thin coats with a foam roller or sprayer, not a standard brush.
Hardware Swaps: The Cheapest Transformation You Can Make
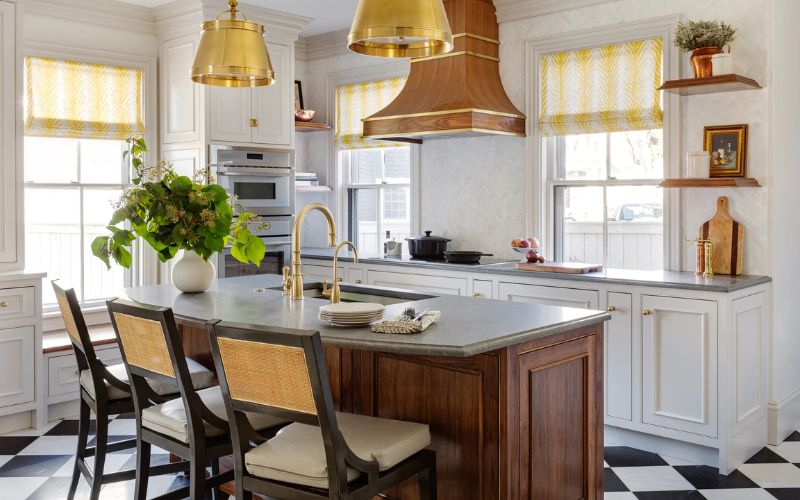
This is genuinely one of the highest-impact, lowest-cost changes available. Old brass knobs and pulls instantly date a kitchen, especially if they’re worn or mismatched. Swapping them for modern handles in brushed nickel, matte black, or brushed brass can cost as little as $2 to $8 per piece.
A few tips that make this project go smoothly:
Measure the hole spacing on your existing hardware before shopping. Pulls come in standard spacings (typically 3 inches or 96mm apart), and buying the wrong size means either drilling new holes or dealing with mismatched holes.
If your new hardware doesn’t match your old hole spacing, you can use a backplate to cover the old holes rather than filling and repainting.
Buy one sample piece first and hold it up against your cabinets before ordering enough for the whole kitchen. Finishes look different under different lighting.
Rethink Your Countertops Without Replacing Them:
Countertop replacement is expensive largely because of the material and the labor to template, fabricate, and install it. But there are middle-ground options:
Countertop refinishing kits exist for laminate counters and can give a passable stone-like appearance for a fraction of the cost of real stone. They’re not perfect a trained eye can usually tell but from a normal viewing distance, a well-applied kit looks dramatically better than a worn 1990s laminate counter.
If your counters are in decent shape but just look dated, sometimes a thorough deep clean and re-sealing (for stone counters) is all that’s needed. Stains and dullness in granite or marble counters often come from a worn sealant layer, not permanent damage.
Backsplash: Small Area, Big Visual Impact
The backsplash occupies a small physical footprint but plays an outsized role in how a kitchen feels. Because it’s a small area, it’s one of the most cost-effective places to splurge slightly on materials, since you’re not covering much square footage.
Options worth considering:
Peel-and-stick tile has improved dramatically in quality over the past several years. Modern versions can be difficult to distinguish from real tile once installed, and they’re a genuinely reasonable weekend project for a beginner.
Beadboard backsplash, painted to match or contrast your cabinets, gives a cottage or farmhouse look for very little material cost.
If you’re willing to do real tile work, subway tile remains a classic choice because it’s inexpensive per square foot and forgiving for first-time tilers, since the grid pattern hides minor imperfections better than more intricate layouts.
Lighting Changes That Change Everything:
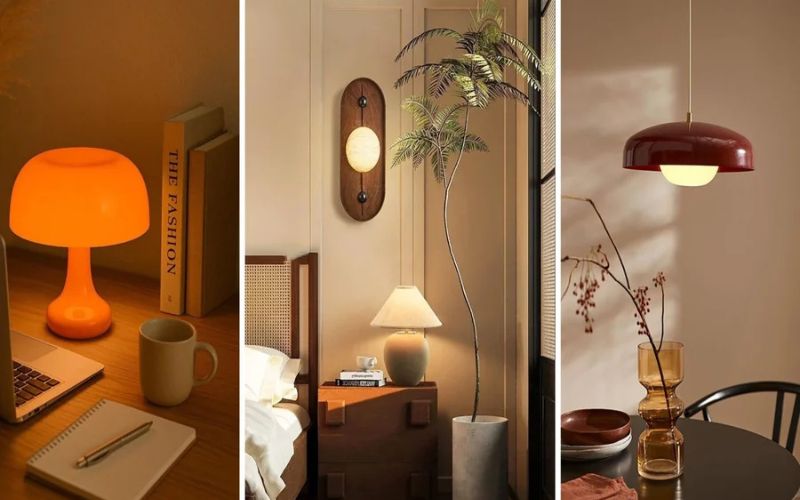
Kitchens are frequently under-lit or lit with a single harsh overhead fixture that makes everything look flat and clinical. Lighting is an area where a modest investment pays off disproportionately.
Under-cabinet lighting is one of the best-value additions you can make. LED strip lights or puck lights, often battery-powered or plug-in (no electrician required for many models), illuminate your countertops and add warmth to the whole room in the evening.
Swapping out a dated overhead fixture for a modern pendant or flush-mount light is another relatively cheap change, assuming the wiring is already in place you’re just replacing the fixture itself, not rewiring the room.
Paint: The Underrated Kitchen Transformer
We tend to think about paint for cabinets, but the walls themselves matter too. A fresh coat of paint in a color that complements your cabinets and counters can shift the entire feel of the space. Light, warm neutrals tend to make kitchens feel larger and cleaner, while deeper tones on a single accent wall or kitchen island can add character without overwhelming a small space.
Don’t overlook the ceiling. Kitchen ceilings accumulate grease and grime from cooking over the years and are rarely repainted. A fresh coat of ceiling paint, even in the same white, can make a kitchen feel noticeably cleaner and brighter.
Open Shelving as a Budget Alternative to New Cabinets:
If some of your upper cabinets are in rough shape, or you simply want a more open, modern feel, removing one or two cabinet doors and converting that section to open shelving is a popular and inexpensive option. It requires minimal carpentry, sometimes just removing the doors and touching up the interior with paint and instantly changes the visual weight of the kitchen.
The tradeoff is that open shelves require more maintenance, since everything on them is visible and collects dust. If you go this route, keep the display minimal and curated rather than crowding the shelves with everyday clutter.
Flooring on a Budget:
Full flooring replacement can be costly, but there are budget-conscious paths here too:
Peel-and-stick vinyl tile is inexpensive, water-resistant (important in a kitchen), and can often be installed directly over existing flooring if it’s flat and in reasonable condition.
If your existing floor is hardwood but scratched and dull, refinishing rather than replacing can restore it for a fraction of the cost of new flooring.
For tile floors with dated or damaged grout, a thorough grout cleaning and re-staining can make old tile look significantly newer without touching the tile itself.
Small Details That Add Up:
A few additional low-cost changes worth considering as you plan your makeover:
Faucet replacement. A modern faucet in a finish that matches your new hardware ties the whole room together and is usually a manageable DIY plumbing task.
Outlet and switch covers. Swapping yellowed plastic covers for new ones in a matching finish is a five-dollar fix that removes an easily overlooked eyesore.
Window treatments. A simple café curtain or roman shade in a fresh fabric can soften a kitchen and add color without any construction involved.
Removing clutter from countertops. This costs nothing but dramatically changes how a kitchen photographs and feels day to day. Fewer small appliances left out, more visible counter space.
Planning Your Budget Makeover Step by Step:
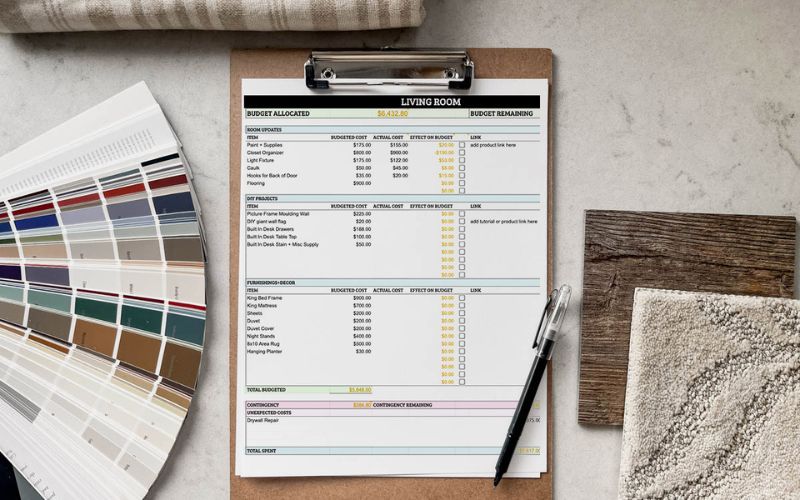
If you’re working with a limited budget, the order in which you tackle these projects matters. Here’s a sensible sequence:
1. Declutter and deep clean first. You’ll be amazed how much better a kitchen looks with nothing more than a genuinely thorough clean, including inside cabinets, behind appliances, and along baseboards.
2. Paint cabinets and walls next, since this has the single biggest visual impact relative to cost.
3. Update hardware and light fixtures once paint is dry.
4. Address the backsplash if your budget allows.
5. Tackle flooring or countertops last, since these are the most expensive and disruptive projects, and you may find after the earlier steps that you’re satisfied with the improvement already.
Choosing a Color Palette That Doesn’t Date Quickly:
One of the most common regrets after a kitchen makeover is choosing a color trend that feels exciting in the moment but looks dated within a couple of years. All-white kitchens, dramatic navy islands, and matte black everything have all had their moment, and while none of these are inherently bad choices, it’s worth thinking about longevity before committing.
A practical approach is to keep large, expensive-to-change surfaces cabinets, counters, flooring in more neutral, timeless tones, and reserve bolder colors for elements that are cheap and easy to swap later: a painted accent wall, a colorful rug, open shelving decor, or even just a few statement light fixtures.
Warm whites, soft greiges, and muted sage or olive greens have shown lasting appeal across multiple design cycles, largely because they pair well with both warm and cool-toned materials like brass hardware or stainless steel appliances.
Appliance Facelifts Without Replacement:
Not everyone has room in the budget to replace appliances during a makeover, and that’s often fine, since a mismatched appliance doesn’t have to derail the whole look.
Appliance film or wraps vinyl coverings designed specifically for refrigerators, dishwashers, and ranges can convert an outdated white or beige appliance into a stainless steel or matte black look for a fraction of replacement cost. These aren’t permanent, so if you move or eventually replace the appliance, the wrap can be removed without damage.
For refrigerators specifically, adding a magnetic panel or chalkboard-style cover can also serve a decorative purpose while hiding an outdated finish, particularly useful for a fridge that’s still functionally fine but visually clashes with a fresh cabinet color.
If a full appliance swap is within budget for just one piece, prioritize the range hood or range first, since these tend to be the most visually prominent appliances in a typical kitchen layout, often more so than the refrigerator.
Dealing With an Awkward or Dated Layout Without Moving Walls:
Sometimes what feels wrong about a kitchen isn’t the finish at all, but the layout itself: an island that’s too small, an awkward walkway, or a peninsula that no longer suits how the space is used. Full layout changes are expensive, but there are partial fixes worth considering.
A rolling kitchen cart can add counter space and storage in an awkward layout without any construction, and can be moved or removed entirely if it doesn’t work out.
If a peninsula or partial wall feels like it’s choking off the room without serving a real structural purpose, it’s worth getting a contractor’s opinion specifically on removing just that non-structural element, since this is sometimes a smaller, more affordable project than a full renovation, even though it still requires professional involvement.
Rearranging where small appliances and everyday items live, sometimes called a “kitchen triangle” adjustment, referring to the relationship between the sink, stove, and refrigerator can also meaningfully improve how a kitchen functions day to day, entirely for free.
Budgeting for the Unexpected:

Even a modest, cosmetic-focused kitchen makeover tends to reveal small surprises once you start a cabinet door that turns out to be more damaged than it looked, an outlet that needs updating to meet code once you’re working near it, or a wall that isn’t quite as flat as it appeared once the old backsplash comes down.
A commonly recommended approach is to add roughly 10 to 15 percent on top of your planned budget as a buffer for these kinds of surprises. If nothing unexpected comes up, that buffer simply becomes room for an extra upgrade, like nicer hardware or an additional light fixture, rather than money wasted.
A Realistic Budget Breakdown:
For those wanting rough numbers to plan around, here’s a general sense of what different tiers might cost:
– Under $200: Deep clean, hardware swap, outlet covers, paint touch-ups.
– $200–$800: Full cabinet paint job, new light fixture, peel-and-stick backsplash.
– $800–$2,000: All of the above plus under-cabinet lighting, new faucet, peel-and-stick flooring.
– $2,000–$5,000: Butcher block counters, real tile backsplash, open shelving carpentry, professional cabinet refacing.
Sourcing Materials Without Overspending:
Where you buy your materials can meaningfully affect the total cost of a budget makeover, sometimes more than the choice of materials itself.
Salvage and reuse stores, often run by nonprofit home-building organizations, frequently carry discounted cabinet hardware, light fixtures, and even usable cabinets pulled from other renovation projects. Prices are typically a fraction of retail, and inventory changes constantly, so a few visits over a couple of weeks often turns up better finds than a single trip.
Online marketplace listings for local sellers are another underused source, particularly for people renovating or replacing a kitchen who are simply trying to get rid of still-functional cabinets, appliances, or fixtures. Timing matters here; searching regularly rather than once increases the odds of catching a good match.
FAQs:
How Much Does a Budget Kitchen Makeover Cost?
A full kitchen renovation with new cabinets, countertops, flooring, and appliances commonly runs into the tens of thousands of dollars. A cosmetic makeover focused on paint, hardware, lighting, and a backsplash can often be completed for a few hundred.
Do I need to prime cabinets before painting, or can I skip that step?
Priming is one of the few steps in a cabinet paint job that genuinely shouldn’t be skipped. Cabinets are handled constantly and exposed to grease and moisture, and paint applied without a bonding primer tends to chip or peel within months rather than lasting for years.
Is peel-and-stick backsplash tile durable enough for daily cooking use?
Modern peel-and-stick backsplash products are generally rated for kitchen use and hold up reasonably well behind a stove or sink, though extremely close, direct heat exposure (like a pan resting directly against it).
How long does a typical DIY kitchen makeover take from start to finish?
For a cosmetic makeover involving cabinet painting, hardware, and a backsplash, most homeowners working part-time on weekends complete the project within two to four weekends, with cabinet painting typically being the most time-consuming step due to drying time between coats.
Can I paint over cabinets that already have a glossy factory finish?
Yes, as long as you properly degrease and sand the surface first to give the primer something to grip. Skipping the sanding step on a glossy factory finish is one of the most common reasons cabinet paint jobs fail prematurely.
Conclusion:
A kitchen makeover doesn’t have to mean gutting the room and starting from scratch. In most cases, the bones of your kitchen, the layout, the cabinet boxes, even the appliances are perfectly fine. What’s tired is the surface: the color, the hardware, the lighting, the small details that quietly signal “this hasn’t been touched in fifteen years.”
By focusing your budget on paint, hardware, lighting, and a handful of well-chosen upgrades, you can achieve a kitchen that feels genuinely refreshed without the cost, mess, and months-long timeline of a full renovation. Start with the cheapest, highest-impact changes first, live with them for a bit, and then decide whether the bigger-ticket items are still worth it.











Leave a Reply