

Getting started with home improvement projects can feel intimidating, especially if you’ve never picked up a drill or aren’t quite sure what the difference is between spackle and caulk. Home improvement shows and social media make everything look effortless.
The good news is that a huge number of genuinely satisfying, high-impact home improvement projects require very little prior experience. This guide walks through a curated set of beginner-friendly projects, organized roughly from easiest to more involved.
DIY Home Improvement Projects for Beginners: Try easy, budget-friendly ideas to upgrade your home, refresh rooms, and build useful skills with confidence.
Table of Contents
Before You Start: Building a Basic Toolkit:
You don’t need a garage full of specialty tools to handle beginner projects. A modest, well-chosen toolkit covers the vast majority of what you’ll need:
- A cordless drill/driver with a basic bit set
- A tape measure and a level
- A utility knife
- A stud finder
- A hammer and a small set of screwdrivers
- Painter’s tape and drop cloths
- A caulking gun
- Basic safety glasses and a dust mask
Resist the urge to buy every specialty tool you see recommended online before you know you’ll actually use it regularly. Most beginners find that a handful of core tools, used well, get them through 90% of common projects.
Project 1: Painting a Room
Painting is the classic entry-level project, and for good reason it’s relatively forgiving, the materials are inexpensive, and the payoff is dramatic. That said, most first-time painters skip steps that experienced painters consider non-negotiable, which is why their results often look uneven.
The steps that actually matter:
1. Clean the walls first. Dust and grease prevent paint from adhering properly, leading to peeling or uneven texture later.
2. Fill holes and imperfections with spackle, let it dry fully, then sand smooth before painting. Skipping this step means every ding and nail hole will still be visible under fresh paint.
3. Tape carefully, and press the edge of the tape down firmly with a flat tool like a putty knife to prevent paint from bleeding underneath.
4. Cut in the edges first with a brush before rolling the main wall area. This means painting a careful border around the ceiling line, corners, and trim before using the roller for the large open sections.
5. Use a quality roller, not the cheapest one available. Cheap rollers shed fibers into the paint and leave a rougher texture.
6. Apply two coats, even if the first coat looks like it covers well. Paint often looks different once fully dry and cured, and a second coat evens out any streaking.
A common beginner mistake is choosing a paint sheen that doesn’t suit the room. Flat or matte finishes hide wall imperfections well but are harder to clean, making them a poor choice for kitchens and bathrooms.
Project 2: Installing a New Faucet
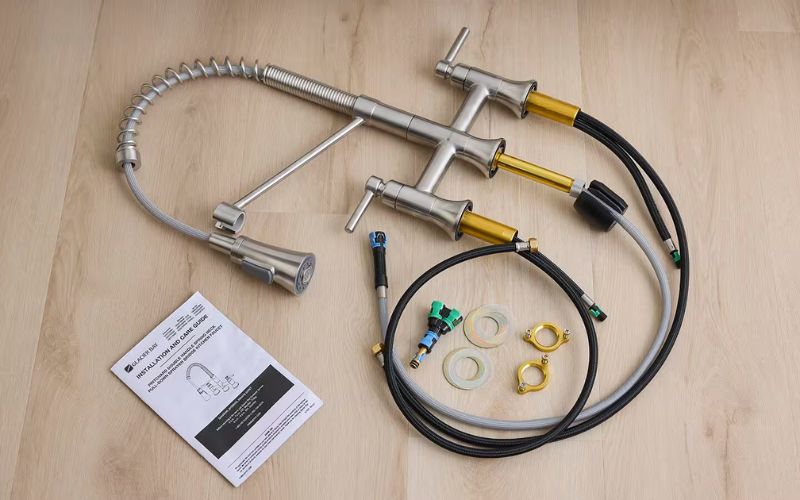
Swapping a kitchen or bathroom faucet is a project that intimidates a lot of beginners because it involves plumbing, but in most cases it’s genuinely manageable without any specialized plumbing knowledge, since you’re not cutting into pipes just disconnecting and reconnecting standard fittings.
General process:
1. Turn off the water supply valves under the sink.
2. Place a bucket or towel below the connections, since some residual water will drain out.
3. Disconnect the supply lines and the mounting nuts holding the old faucet in place.
4. Clean the sink surface where the old faucet sat.
5. Install the new faucet following the manufacturer’s instructions, which vary slightly by model.
6. Reconnect supply lines, turn the water back on slowly, and check carefully for any leaks at the connections.
The most common beginner mistake here is over-tightening plastic or rubber fittings, which can crack them. Hand-tight plus a small additional turn with a wrench is usually sufficient; more force isn’t better.
Project 3: Replacing Cabinet Hardware
As covered in more depth in kitchen-specific guides, swapping cabinet knobs and pulls is one of the easiest true beginner projects available. All it requires is a drill (or often just a screwdriver), a tape measure, and new hardware.
The one detail beginners often miss: measure before you buy. If your new pulls have a different screw-hole spacing than your old ones, you’ll either need to drill new holes or use a backplate to cover the mismatch. Measuring the existing spacing in advance avoids an unpleasant surprise mid-project.
Project 4: Installing Peel-and-Stick Flooring or Backsplash Tile
Peel-and-stick products have become dramatically better in quality over the past several years, making them one of the most approachable ways for a beginner to work with tile without needing tile-cutting tools, thinset, or grout in many cases.
Tips for a clean result:
Make sure the surface underneath is clean, dry, and completely flat. Peel-and-stick products bond poorly over dust, grease, or texture.
Plan your layout before sticking anything down. Dry-lay a row of tiles first to see how the pattern falls, and adjust your starting point so you don’t end up with an awkward sliver of tile at a visible edge.
Use a utility knife with a fresh blade for cutting tiles to fit around edges and outlets; a dull blade tears the material instead of cutting cleanly.
Roll or press firmly after installation to ensure full adhesion, particularly along the edges, which are the most likely spots to eventually lift.
Project 5: Hanging Shelves the Right Way
Hanging a shelf sounds simple, but it’s one of the most commonly botched beginner projects because it depends on correctly finding and using wall studs, something that’s easy to get wrong without the right approach.
Getting it right:
1. Use a stud finder to locate the wood framing behind the drywall. Mark the edges of the stud, not just a single point, so you know its full width.
2. Whenever possible, anchor into studs rather than relying solely on drywall anchors, especially for anything that will hold significant weight.
3. If a stud isn’t available in the right location, use a rated drywall anchor appropriate for the weight of the shelf and its contents. Cheap plastic anchors are only suitable for very light loads.
4. Use a level during installation, not just an eyeballed guess. A shelf that’s even slightly off-level becomes very noticeable over a few feet of length.
Project 6: Caulking Around Tubs, Sinks, and Windows
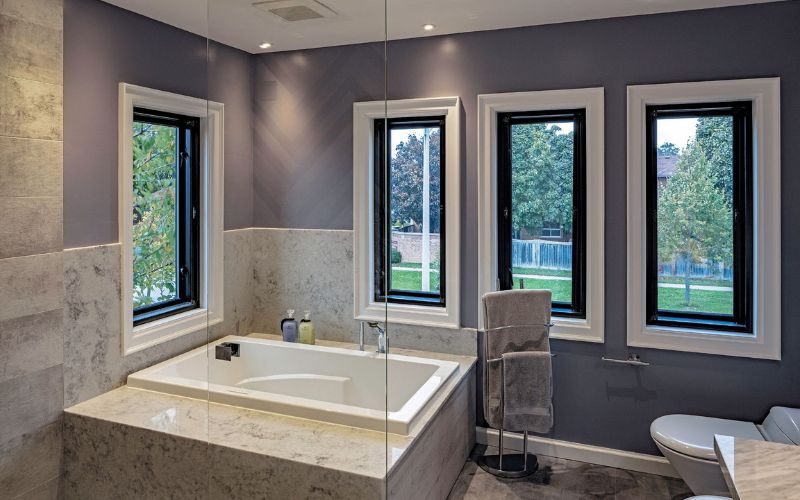
Old, cracked, or discolored caulk is one of those details that quietly makes a bathroom or kitchen look neglected, and re-caulking is a project well within reach for a total beginner.
Steps for a clean finish:
1. Remove the old caulk completely first, using a caulk removal tool or a utility knife, and clean the area thoroughly. New caulk applied over old caulk never looks good and doesn’t seal properly.
2. Let the area dry fully before applying new caulk, since trapped moisture will affect adhesion.
3. Apply painter’s tape along both edges of the gap to guide a clean line, if you want a crisp finished look.
4. Cut the caulking tube tip at a shallow angle for a thin, controlled bead.
5. Apply the caulk in one continuous motion, then immediately smooth it with a wet finger or a caulking tool before it begins to skin over.
6. Remove the tape while the caulk is still wet for the cleanest edge.
Project 7: Weatherstripping Doors and Windows
This project rarely gets attention because it’s not visually dramatic, but it’s genuinely one of the best return-on-effort projects available to a beginner, since it directly affects energy bills and comfort.
Most weatherstripping products are self-adhesive foam or rubber strips that install by simply cleaning the surface, measuring, cutting to length, and pressing into place along the door or window frame where air currently leaks through. No tools beyond scissors or a utility knife are typically required.
Project 8: Installing a Programmable or Smart Thermostat
For anyone comfortable with very basic electrical work, replacing an old thermostat with a modern programmable or smart model is a manageable weekend project.
Important safety step: always turn off power to the HVAC system at the breaker before beginning, not just at the thermostat itself.
The key to a smooth installation is labeling each wire with the letter printed next to its terminal on the old thermostat before disconnecting anything. Take a photo of the wiring as an extra backup.
Project 9: Refreshing Grout
Grout that’s stained, cracked, or discolored ages a bathroom or kitchen significantly, and refreshing it is far cheaper and more approachable than replacing tile.
For grout that’s simply dirty rather than damaged, a dedicated grout cleaner and a stiff brush, followed by a grout sealer once dry, can restore much of the original appearance.
For grout with actual cracks or gaps, a grout pen or grout paint product allows a beginner to essentially recolor and seal the grout lines in one step, without needing to remove and repack the grout itself.
Project 10: Building a Simple Floating Shelf
For those ready to try light carpentry, a basic floating shelf is a satisfying step up from purely cosmetic projects. Pre-made floating shelf kits, which include the shelf and a concealed mounting bracket, are the easiest entry point, since all the joinery work is already done the beginner’s job is simply to mount the bracket securely into studs and slide the shelf into place.
Project 11: Installing a New Light Fixture
Swapping an existing light fixture for a new one, a pendant, flush mount, or vanity light is a manageable beginner electrical project, provided you’re simply replacing a fixture at an existing electrical box rather than adding new wiring.
The general process:
1. Turn off power at the breaker, not just the wall switch, and confirm it’s off using a non-contact voltage tester before touching any wires.
2. Remove the old fixture and note which wires connect where typically black to black (hot), white to white (neutral), and a bare or green wire to ground.
3. Connect the new fixture’s wires to the matching household wires using wire nuts, twisting them securely and wrapping with electrical tape for extra security.
4. Mount the new fixture according to its included hardware, which varies by fixture weight and design.
5. Restore power and test.
The most important safety habit here is never assuming a switched-off breaker is correctly labeled. Always verify with a voltage tester before touching bare wires, since breaker box labels are notoriously unreliable in older homes.
Project 12: Refreshing Grout Lines
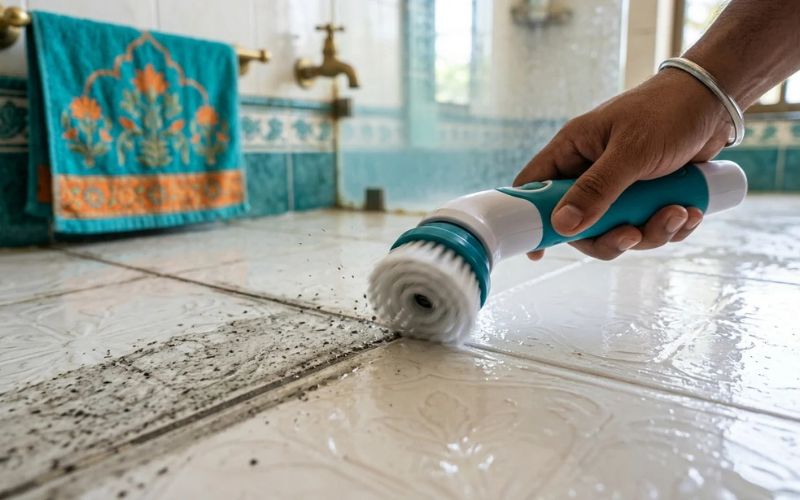
Grout naturally discolors and can develop small cracks over time, and refreshing it is a manageable, if somewhat tedious, beginner project that makes an outsized difference in how a tiled room looks.
For grout that’s simply dirty, a dedicated grout cleaner, warm water, and a stiff nylon brush, applied with some elbow grease, can restore much of the original color without touching the grout itself.
For grout that’s genuinely stained or has lost its color, a grout pen or grout paint allows a beginner to recolor and seal grout lines directly, without needing to remove and repack the existing grout.
Project 13: Installing a Towel Bar or Robe Hook
A small but satisfying project for a first-time DIYer, installing a new towel bar or robe hook mainly comes down to accurate measuring and, ideally, anchoring into a wall stud where possible.
If a stud isn’t available in the desired location, use properly rated wall anchors suited to drywall, since a towel bar that pulls out of the wall after a few months is one of the more common beginner disappointments usually traceable back to using inadequate anchors for the material and location.
Common Beginner Mistakes and How to Avoid Them
Looking across the projects covered in this guide, a handful of mistakes come up again and again for people just starting out. Being aware of them in advance can save considerable frustration.
Not testing paint or stain colors in the actual room first. Lighting varies enormously between store displays, online photos, and your actual space. Always test a small sample on the real surface, in the real room, before committing to a full can.
Using the wrong type of screw or anchor for the wall material. Drywall, plaster, brick, and wood framing all require different fastening approaches, and using a fastener meant for one material in another often leads to a failed installation down the road.
Rushing dry times. Paint, caulk, adhesive, and joint compound all have specified drying or curing times for a reason. Working over a surface before it’s fully cured is one of the most common causes of a repair or project failing prematurely.
Underestimating cleanup time. Especially for painting and tiling projects, cleanup can take nearly as long as the actual work. Budgeting time for this in advance prevents the frustration of running out of daylight or energy before a project is genuinely finished.
Learning to Diagnose Problems, Not Just Follow Steps
As you complete more beginner projects, one of the most valuable skills you’ll develop isn’t a specific technique, but the ability to diagnose what’s actually going on before jumping to a fix. A wobbly cabinet door might be a loose hinge screw, a warped door, or a shifted cabinet box and each of those has a different repair.
Taking a few extra minutes to understand the actual cause of a problem, rather than assuming the first likely explanation, saves time and materials in the long run and is a habit that separates confident DIYers from those who repeat the same fix over and over without lasting success.
General Principles That Apply to Every Beginner Project
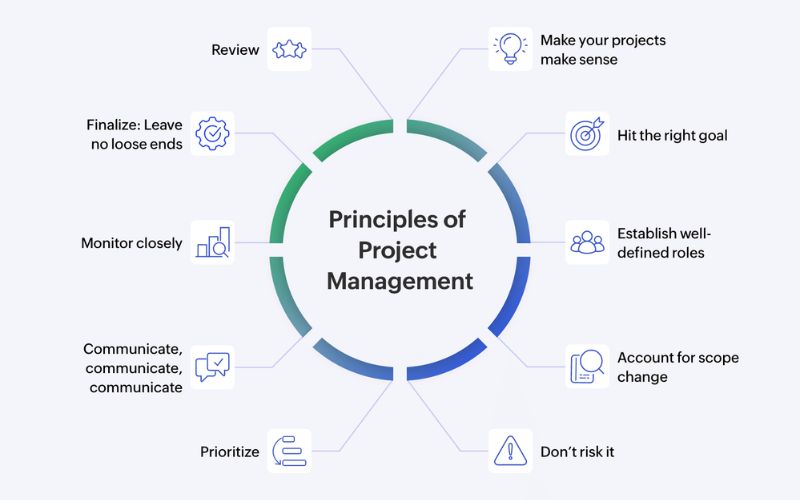
A few pieces of advice apply across nearly all of the projects above, and are worth internalizing early:
Measure twice, cut once is a cliché because it’s consistently true. Rushing the measuring stage is the most common source of wasted materials and redone work.
Read the full instructions before starting, not partway through. Many projects have a step that’s much easier to prepare for in advance like turning off water or power that’s frustrating to realize you missed halfway through.
Don’t skip prep work. Cleaning, sanding, and taping feel like they’re not “real” progress, but they’re usually the difference between an amateur-looking result and a genuinely clean one.
Buy slightly more material than you think you need. Running out of paint, tile, or caulk mid-project and having to match a new batch, which may not be an exact match, is a common and avoidable frustration.
Watch a video specific to your exact project before starting, even for tasks that seem straightforward. Seeing the physical motions involved, rather than just reading steps, often clarifies details that text alone doesn’t capture.
Building Confidence for Bigger Projects
Once a few of the projects above start to feel comfortable, most beginners naturally progress toward slightly more involved work installing light fixtures, basic tiling, simple carpentry, or minor drywall repair. The skills overlap significantly: the patience for careful measuring, the comfort with basic tools, and the willingness to research before starting all carry forward.
The projects in this guide were chosen specifically because they offer a high ratio of visible improvement to required skill, which matters for staying motivated. A kitchen that looks noticeably better after a weekend of hardware swaps and a fresh coat of paint builds the kind of confidence that makes the next, slightly bigger project feel approachable rather than overwhelming.
FAQs:
What Is the Easiest Home Project?
Swapping cabinet hardware or repainting a small room are usually the most approachable starting points, since both involve low material cost, minimal risk of a costly mistake, and results that are immediately visible once finished.
Do I really need a stud finder, or can I estimate where studs are?
A stud finder is worth the modest cost. Estimating stud locations by tapping on the wall or measuring from a corner is unreliable enough that it frequently leads to anchoring into empty drywall, which fails under weight far more easily than a proper connection into structural framing.
When Does a Project Need a Professional?
As a general guideline, anything involving gas lines, structural changes, main electrical panel work, or plumbing beyond swapping a fixture is worth professional involvement. Most cosmetic, surface-level projects covered in typical beginner guides remain safely within DIY territory.
Is it cheaper to DIY a project or hire a professional?
For most of the projects in this guide, DIY is significantly cheaper, since labor typically makes up a large share of a professional’s quote. That said, factor in the cost of any tools you’ll need to purchase, and weigh that against.
What should I do if I make a mistake partway through a project?
Most beginner-level mistakes, like an uneven paint line or a slightly misaligned shelf, are fixable rather than permanent. Pausing to research the specific issue, rather than pushing forward and hoping it resolves itself, usually leads to a better outcome than trying to rush past a problem.
Conclusion:
Home improvement doesn’t have to start with an intimidating full renovation. The projects outlined here painting, hardware swaps, caulking, basic shelving, and similar tasks are genuinely accessible to someone with no prior experience, a modest toolkit, and a willingness to follow instructions carefully.
Start with one or two of the simpler projects, take your time, and don’t be afraid to look up a video or ask questions along the way. Each completed project builds both a more comfortable home and the practical confidence to tackle the next one.












Leave a Reply